By default automatic App update is enabled in most of the Android smartphones. Whenever you connect your Android phone to Wi-Fi network, download automatically starts for updates of all apps on your phone. This is good feature to have in general but some time it is distraction of work also. For example, you connected your phone to wifi network after long time to do some other works, the app update started automatically. If you need high bandwidth for your work, the app update will hamper that because that will also eat up significant bandwidth. There may be other reasons why you might want to disable automatic App update. Here we’ll see how you can that from Google play store. Also we’ll see how to manually update your apps when automatic update is disabled such that you can get your updates in your own sweet time.
Follow these steps to disable automatic App update.
1. Open the play store app.

2. Tap on the hamburger sign (three horizontal lines) on the left top corner of the play store app.
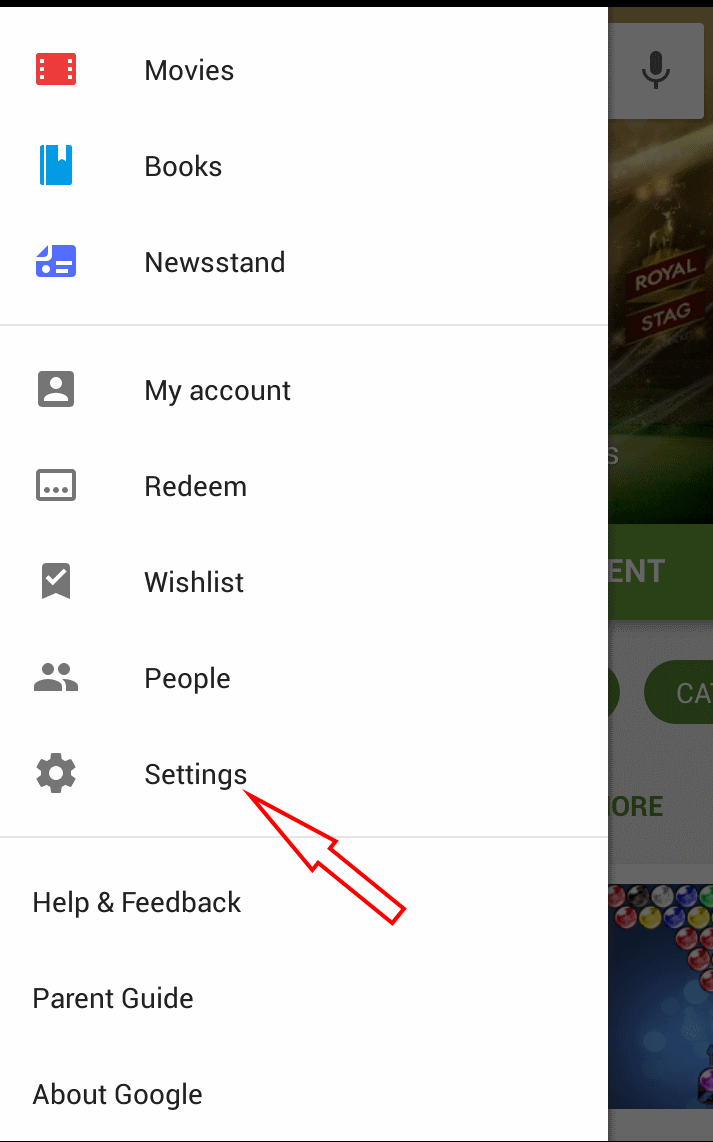
2. Tap on “Settings”. Settings panel will be opened.
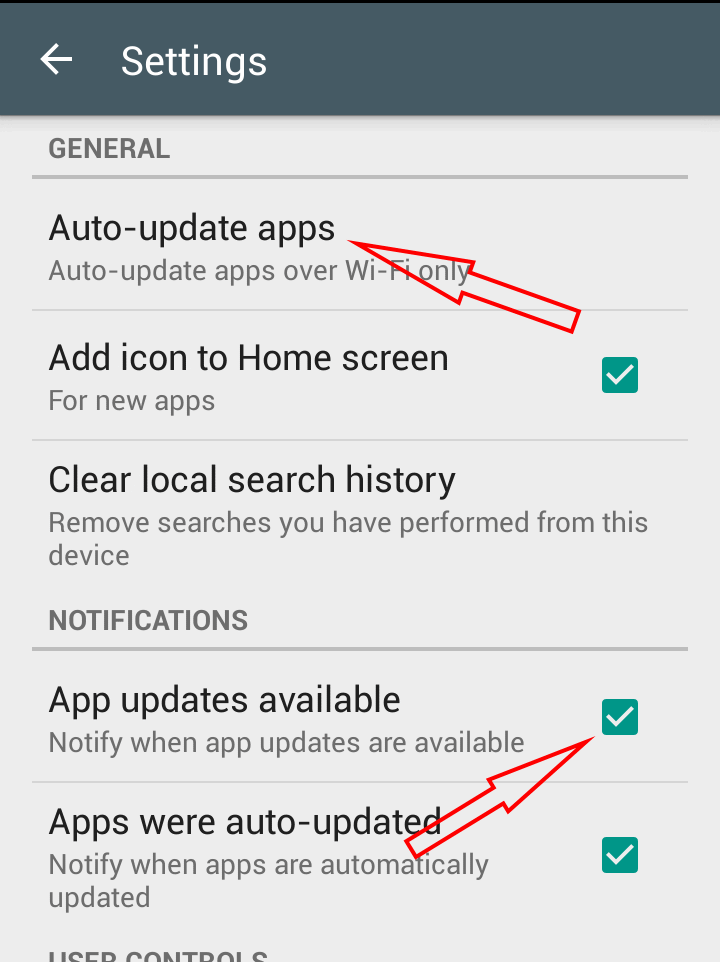
3. Verify that the “App updates available” checkbook is checked. This means that you’ll get notifications whenever any update of your Apps will be available. Tap “Auto-update Apps”. The “Auto-update apps” dialog will appear.
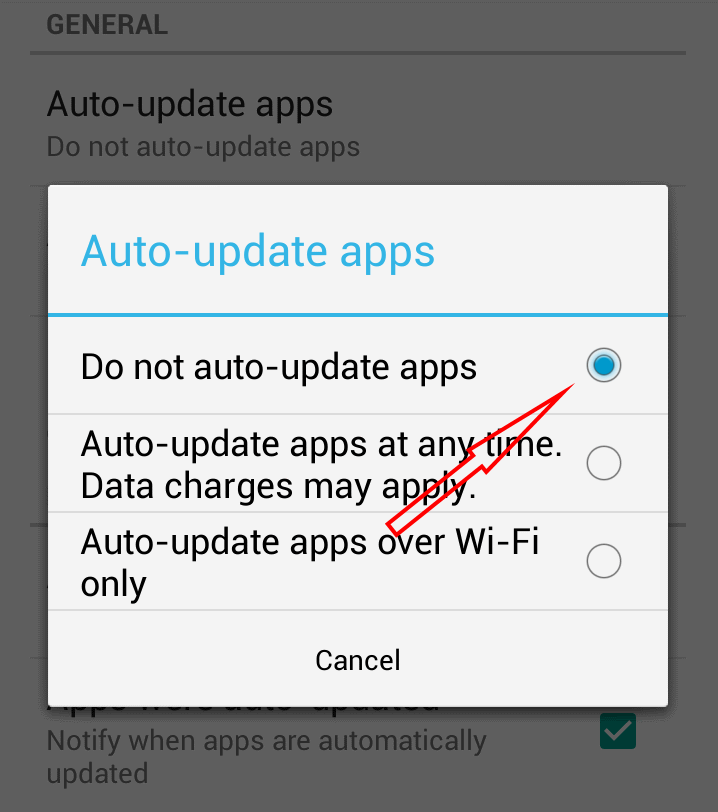
4. In the “Auto-update apps” window, select ” Do not auto-update apps”. That’s all. Your apps will not get updated automatically from now on.
In this section we’ll see how to update the Apps when automatic update is disabled.
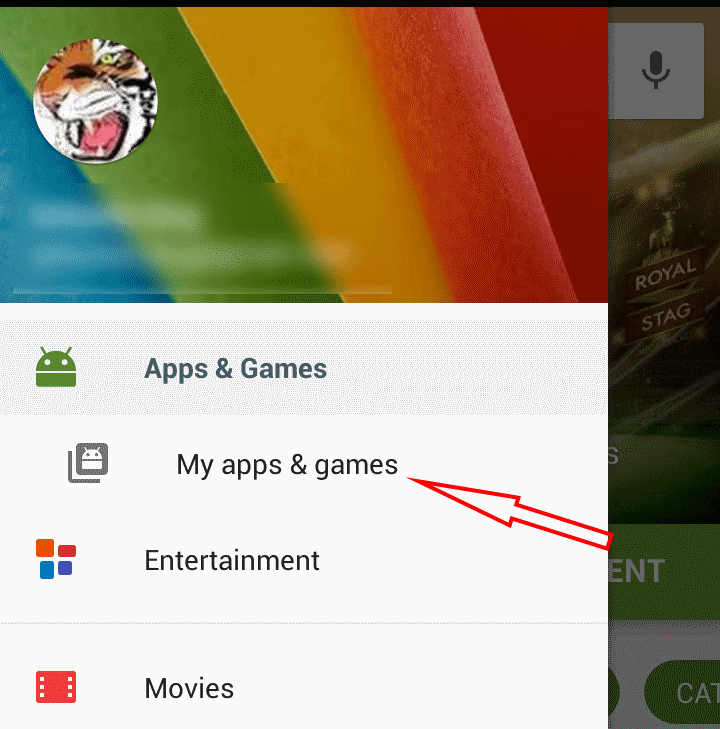
- Tap on the hamburger sign (three horizontal lines) then tap on the “My apps & games”.
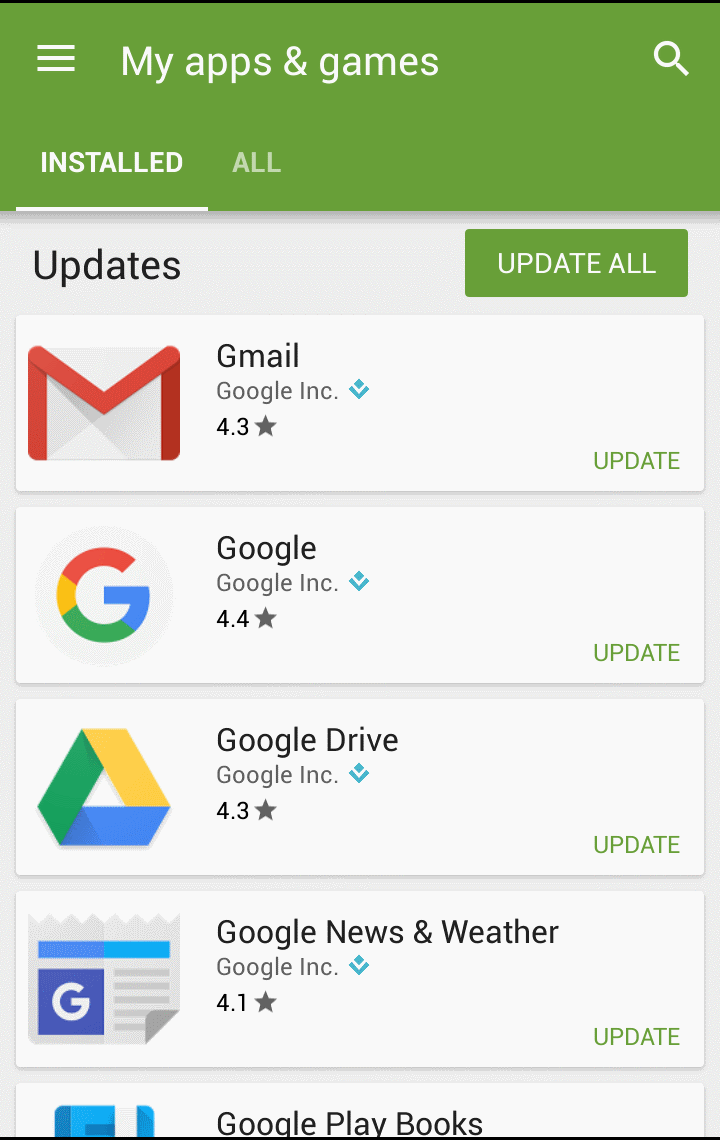
2. All installed Apps will be listed in various sections. In the first section (Updates), there is a button called “UPDATE ALL”. You can press this button if you want to update all apps. Otherwise, you can select a particular all which you want to update. Then press the “UPDATE” button for that App.