Wireshark is a widely used networking tool to capture and analyze protocol packets from networking interfaces of local or remote computer. When two networking devices, like computer, mobile, printer etc, communicate with each other, they exchange information in form of data chunks, also known as protocol packets or messages. This is also true when we access some website, send or receive emails or even we send messages using WhatsApp. Sometimes you need to capture the protocol packets that are being exchanged among networking devices, especially, if you are a network administrator. You want to do so to debug some problem when something wrong in the network is happening or to detect unusual or harmful behavior of any user of your network. Capturing packets from local computer is very trivial, by default Wireshark does that. Many times capturing local system is not sufficient. To understand the overall networking behavior, you might need to capture packets from one or more routers. Routers are usually remote systems, not where you work. The routers could be Windows or Linux computers, most of the time they are Linux ones. This guide will help to configure Wireshark to capture protocol packets from remote computer.
Capturing packet from remote Windows system
- WinPcap needs to be installed on the remote Windows computer. If WireShark is installed on that computer, WinPcap is already there. If not, install WireShark there.
- Open the services panel of the remote computer. Type “View Local Service” on the windows search box if you are using Windows 8 or “services.msc” in the run box of the start menu for pre-Windows 8 systems.
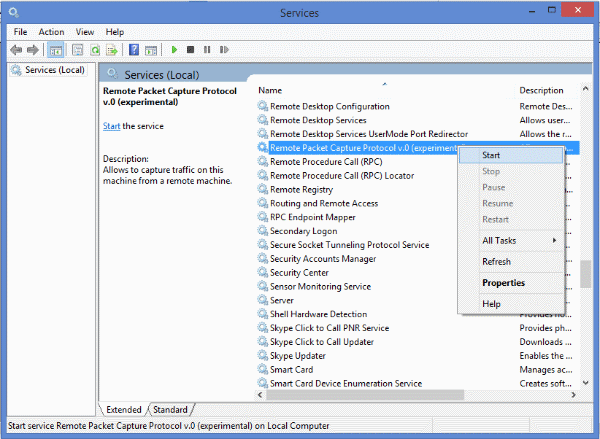
- Start the “Remote Packet Capture Protocol” service.
By default this service is not started. To start the right-click of the service and press start.
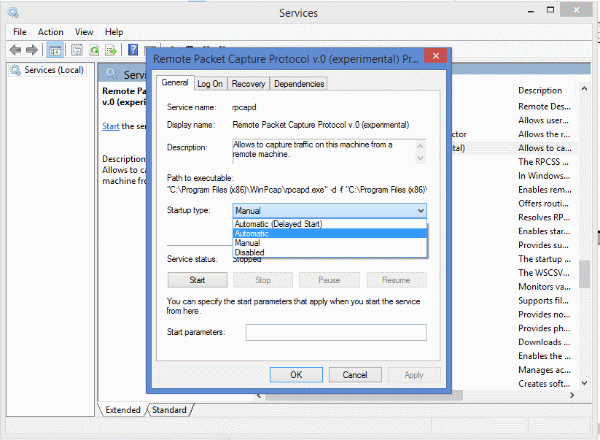
- If you want this service to automatically start after system reboot, double click on the service.
Select “Automatic” from the “Startup type” drop down box. Press Apply and then OK.
- Launch the WireShark application on the local computer where you want to see the captured packets.
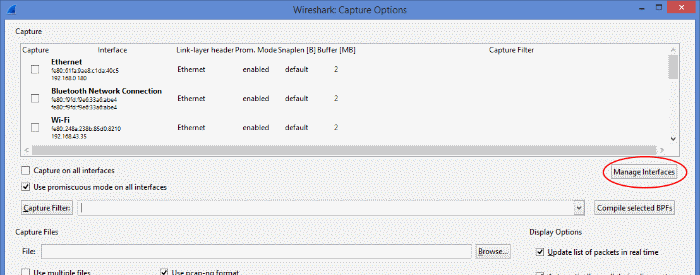
- Select “Capture -> Options”. Then press “Manage Interfaces” to open the “Interface Management” window.
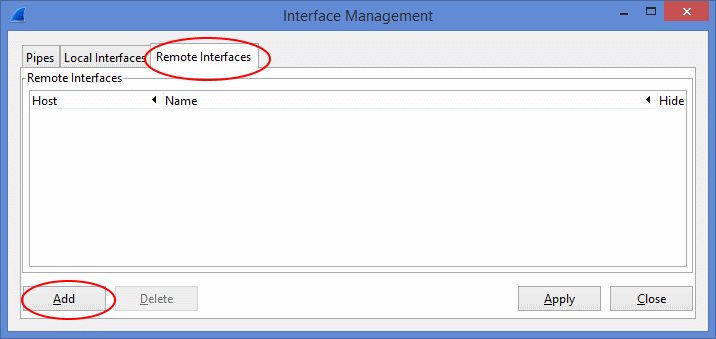
- Select the “Remote Interfaces” tab of the “Interface Management” window. Then press “Add”.
- Select the network interfaces of the remote computer.
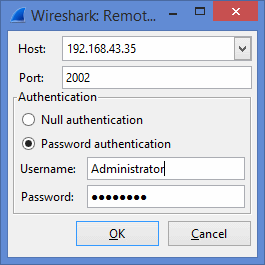
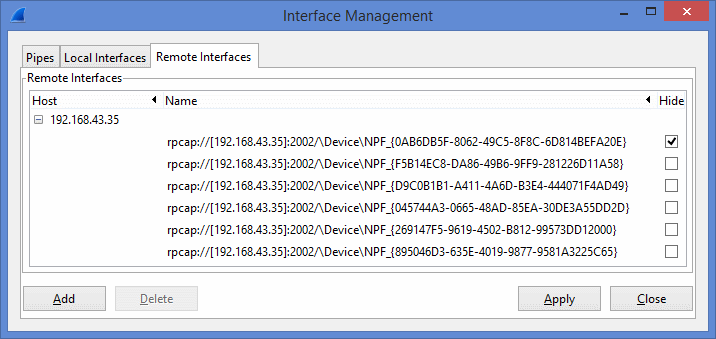
Enter the IP address of the remote computer. In this example IP of the remote computer is 192.168.43.35. Enter 2002 as Port. Then Username and Password of the remote computer.
- All the network interfaces of the remote computer will be listed in the middle list. Select the interfaces you want to capture and press “Apply”.
- The selected netwok intefaces will be added to the main “Wireshark Capture Options” windws’ interface list. Now press “start” on the “Wireshark Capture Options” to capture the packets on the selected network interfaces of the remote computer.
Capturing packet from remote Linux system
- The packet capturing tool in Linux is called tcpdump. So tcpdump needs to be installed on the remote Linux computer. Install tcpdump on RedHat based linux if not already installed.
- Download plink.exe on the local Windows computer.
- Open the command prompt on the local Windows computer. If the IP address of the remote Linux computer is 192.168.0.1, network interface name ens33, username root and password pass123, then run this command on the local Windows computer from command prompt.
yum install tcpdump
plink.exe -ssh -pw pass123 root@192.168.0.1 "tcpdump -ni ens33 -s 0 -w - not port 22" | "C:Program FilesWiresharkWireshark.exe" -k -i -
“Remote Packet Capture Protocol” service is NOT installed with WinPcap or NPcap. I don’t understand where did you and Wireshark devs. got the idea that installing NPcap or WinPcap will also install such a service, but that’s simply not true. At least at the time of writing this comment (2019-04-11).